Chives
Chives (Allium spp. ) are a great option for those beginning their gardening journey. You can harvest yours from spring through fall (and beyond in zone 10) and are hardy in Zones 3 - 10.
Grow Your Own Fresh Chives
Chives are a fantastic plant to grow if you too want to try your hand at gardening, especially if you haven’t yet had much success. These little plants are so forgiving of poor conditions, and with just a bit of tending, you’ll be able to cut way more fresh chives than you could ever think of using.
Onion Chives vs Garlic Chives
There are two types of chives herbs: garlic chives and onion chives, also called common chives.
Garlic Chives
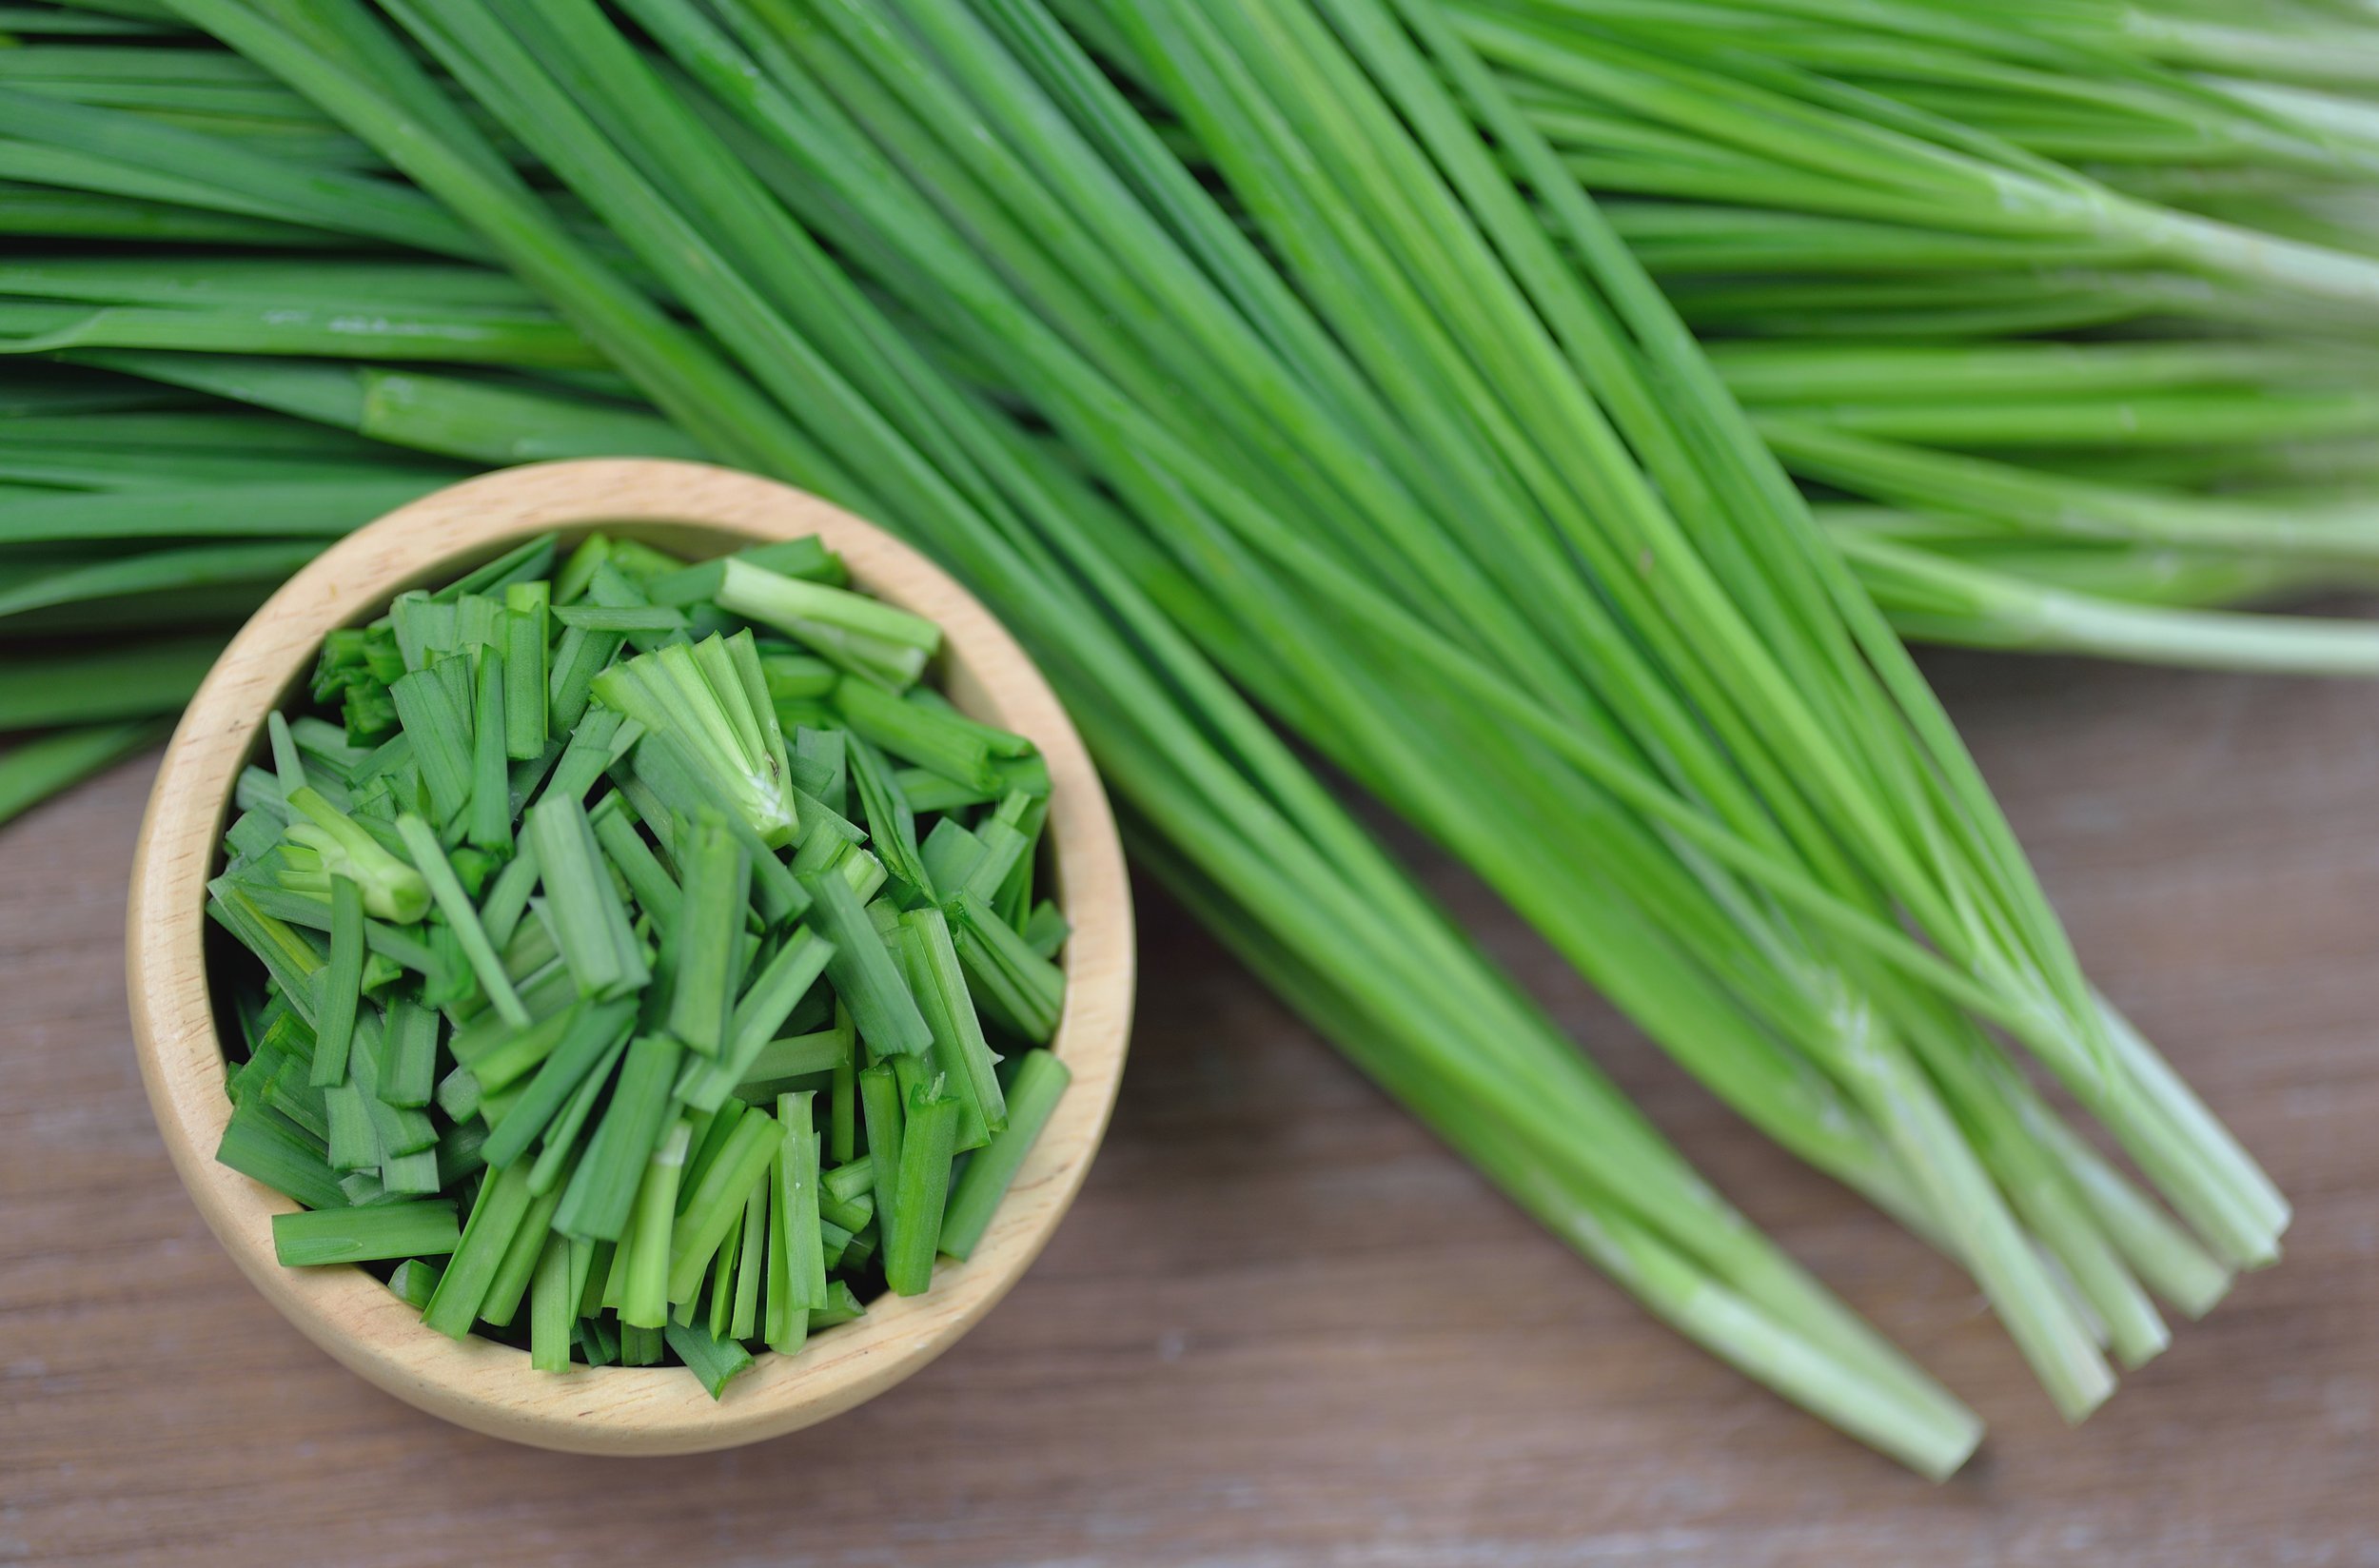
Garlic chives have flat leaves, kind of like skinny blades of grass, and plants can grow to be about 20 inches tall. Their flowers, each one a dainty white star, cluster on little flower heads.
Onion Chives/Common Chives
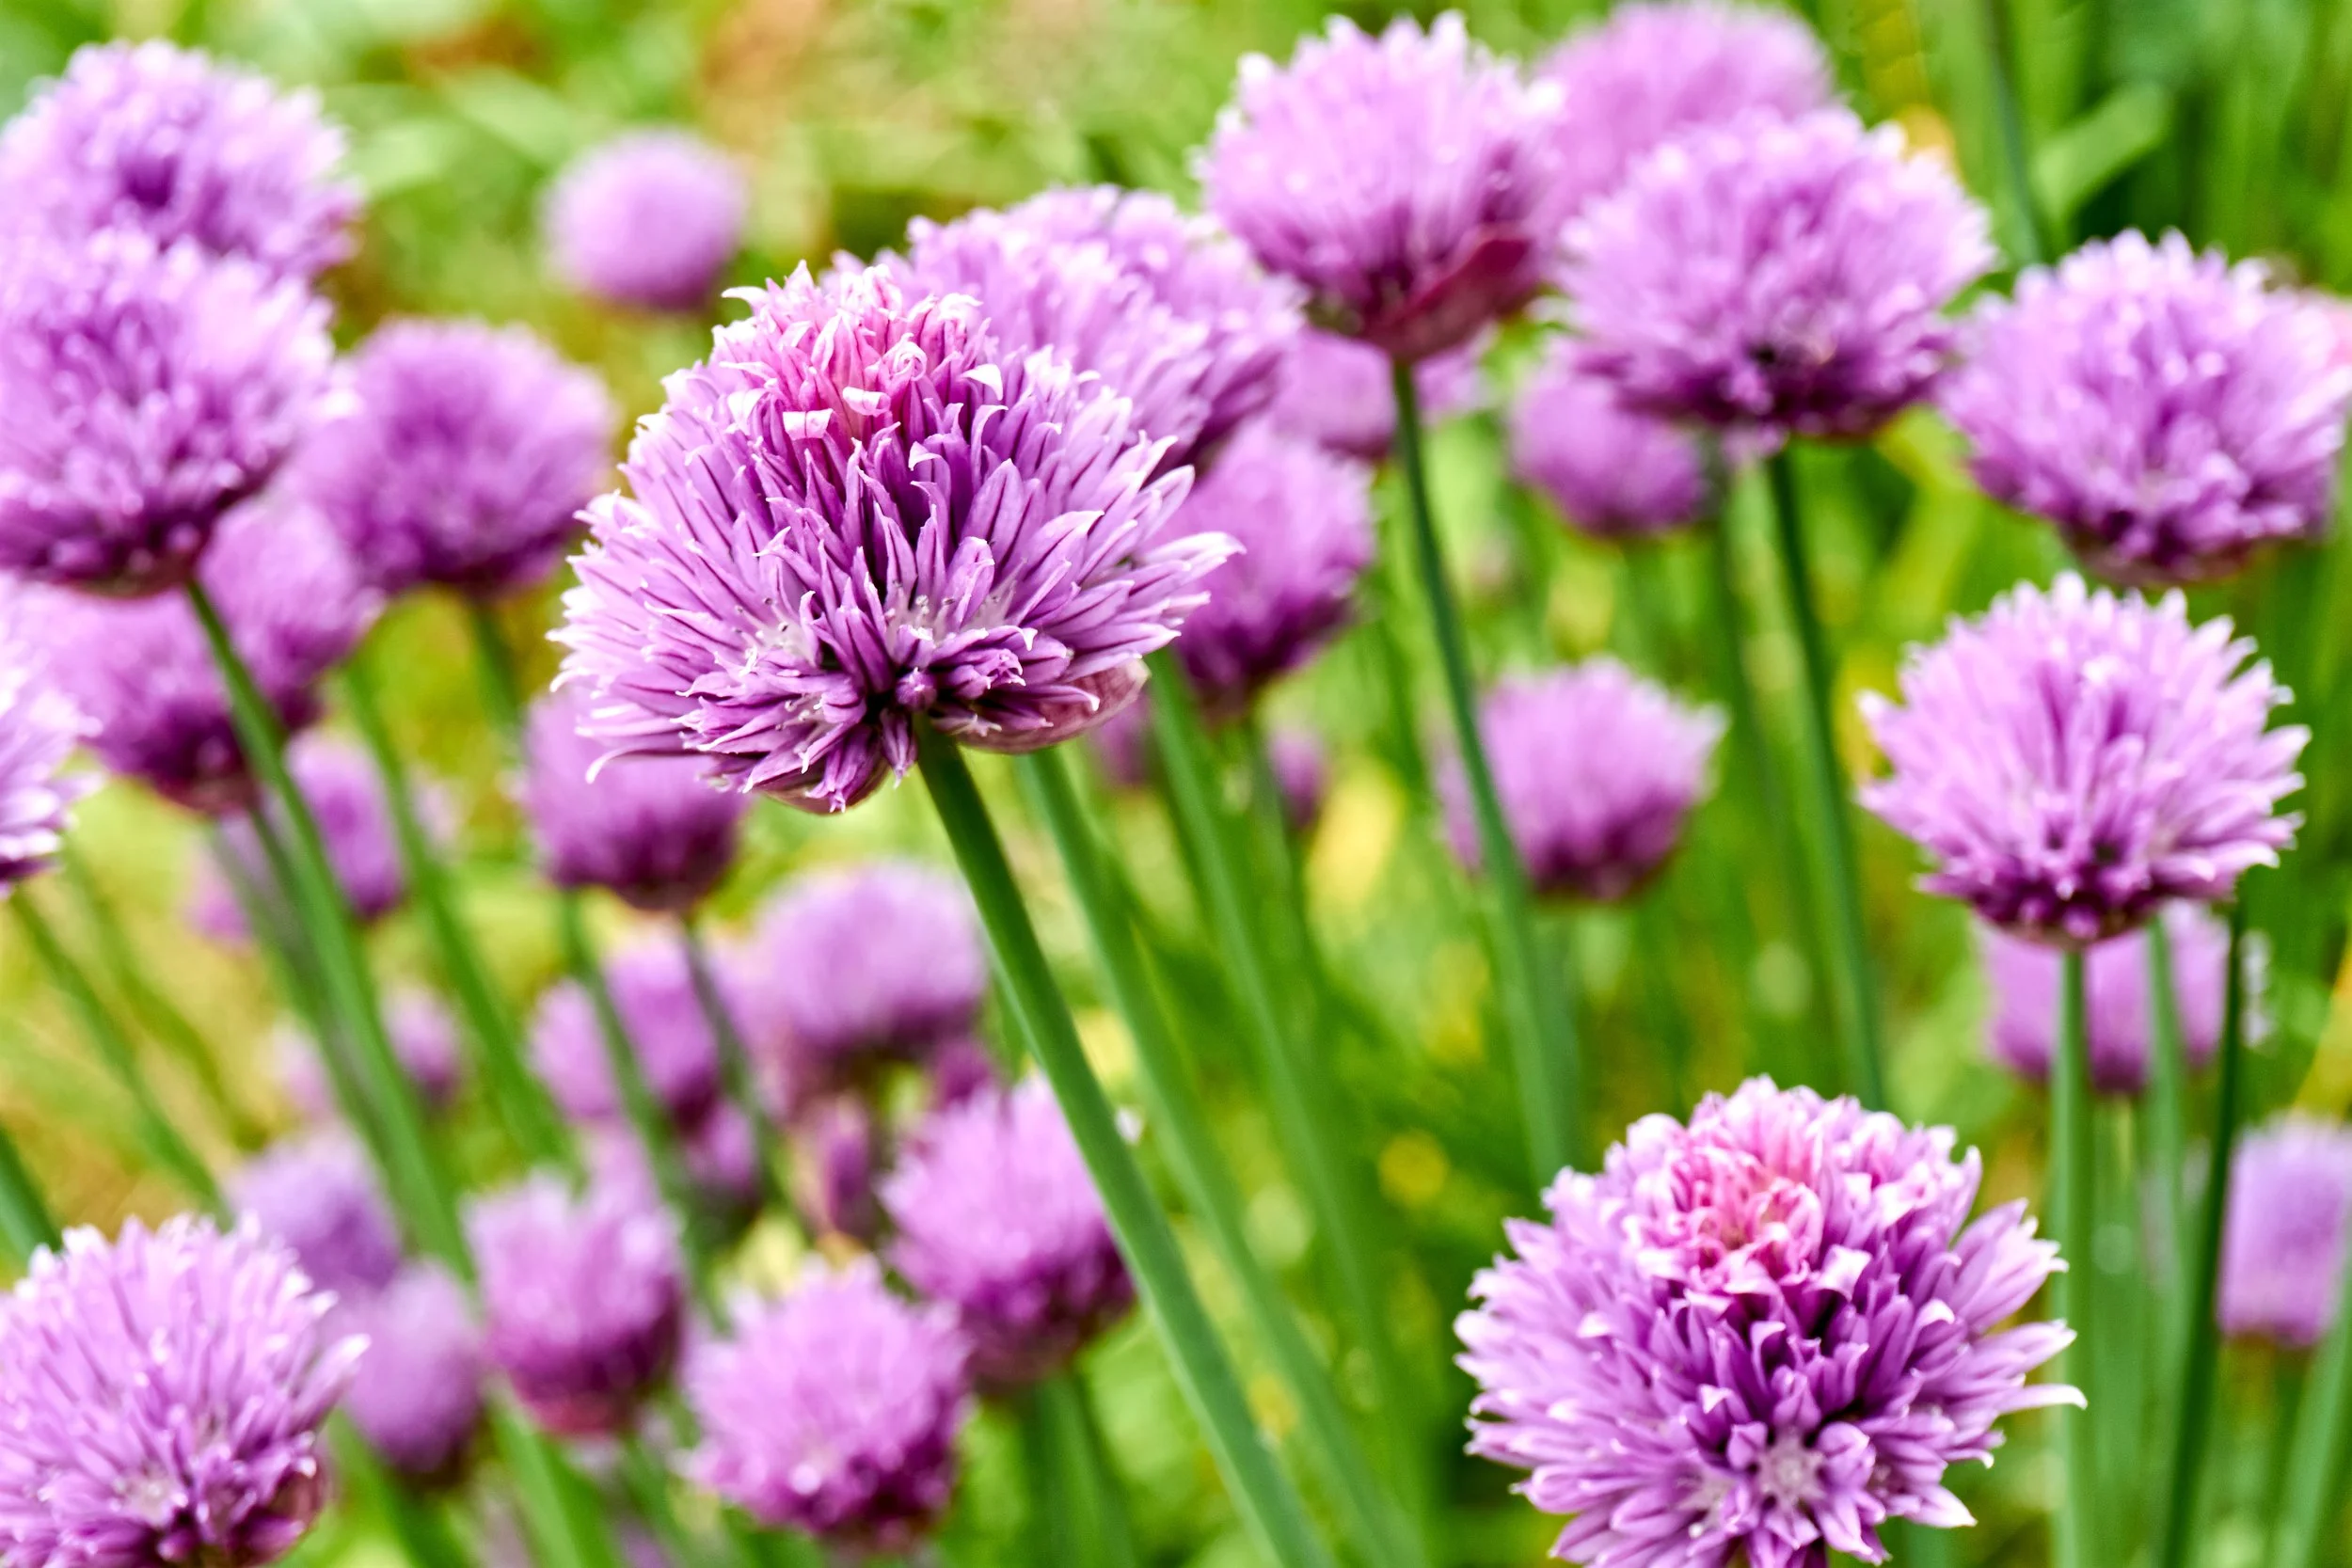
These have thin, hollow leaves instead of blades and can grow 10 to 15 inches tall. It's onion chives that produce those stunning purple blossoms in the spring that you see peeking out of harvest baskets (though flowers can also be white, pink, or red).
As you might expect, onion chives taste more like onions, while garlic chives have a strong garlic flavor. The flowers of both types are edible and extremely attractive to pollinators.
By the way, neither onion chives nor garlic chives are the same thing as green onions, AKA scallions, which are much thicker and change from green tops to crunchy white bottoms (chives are green throughout). They're all in the onion family, but chives have a milder flavor than green onions.
Are Chives Perennial Plants?
Chives are cold-hardy perennial plants that will return from their roots each year. They're known for being a cool season plant, but they can really hang in there in hot and cold climates. If you live in garden hardiness zones 9 and 10, your chives will likely grow year round (as long as they stay well watered in the hottest months). In a colder climate, chives will die back after a heavy frost or snow and then return in the spring. They're typically one of the first plants to pop up after winter.
In addition to returning from their roots each year, chives can also spread via dropped seeds and underground bulbs. You might want to harvest blooms before they dry out to control where future chives plants spring up in your garden. It takes chives a couple of seasons to really begin spreading out, but when they do, you can simply divide each plant using a hori hori or small shovel. Now you've got free plants you can replant around your garden.
It's not hard to see how you can have chive plants producing year after year for you, is it?
Where to Grow Chives
Chives are small plants that need about the circumference of a tea cup to grow in the garden. I love to plant chives in the corners of my raised beds and around the edges of my container gardens. It's not because my family needs so many chives leaves. (Seriously, a plant or two will likely supply more than enough.) It's because chives are excellent natural pest deterrents.
I call chives "pest interrupters" because their oniony or garlicky smell repels bad-news-bugs like aphids, Japanese beetles, caterpillars, and other things that like to eat your greens. Honestly, it's a great idea to tuck some chives into any empty patches of your garden for no other reason than this one.
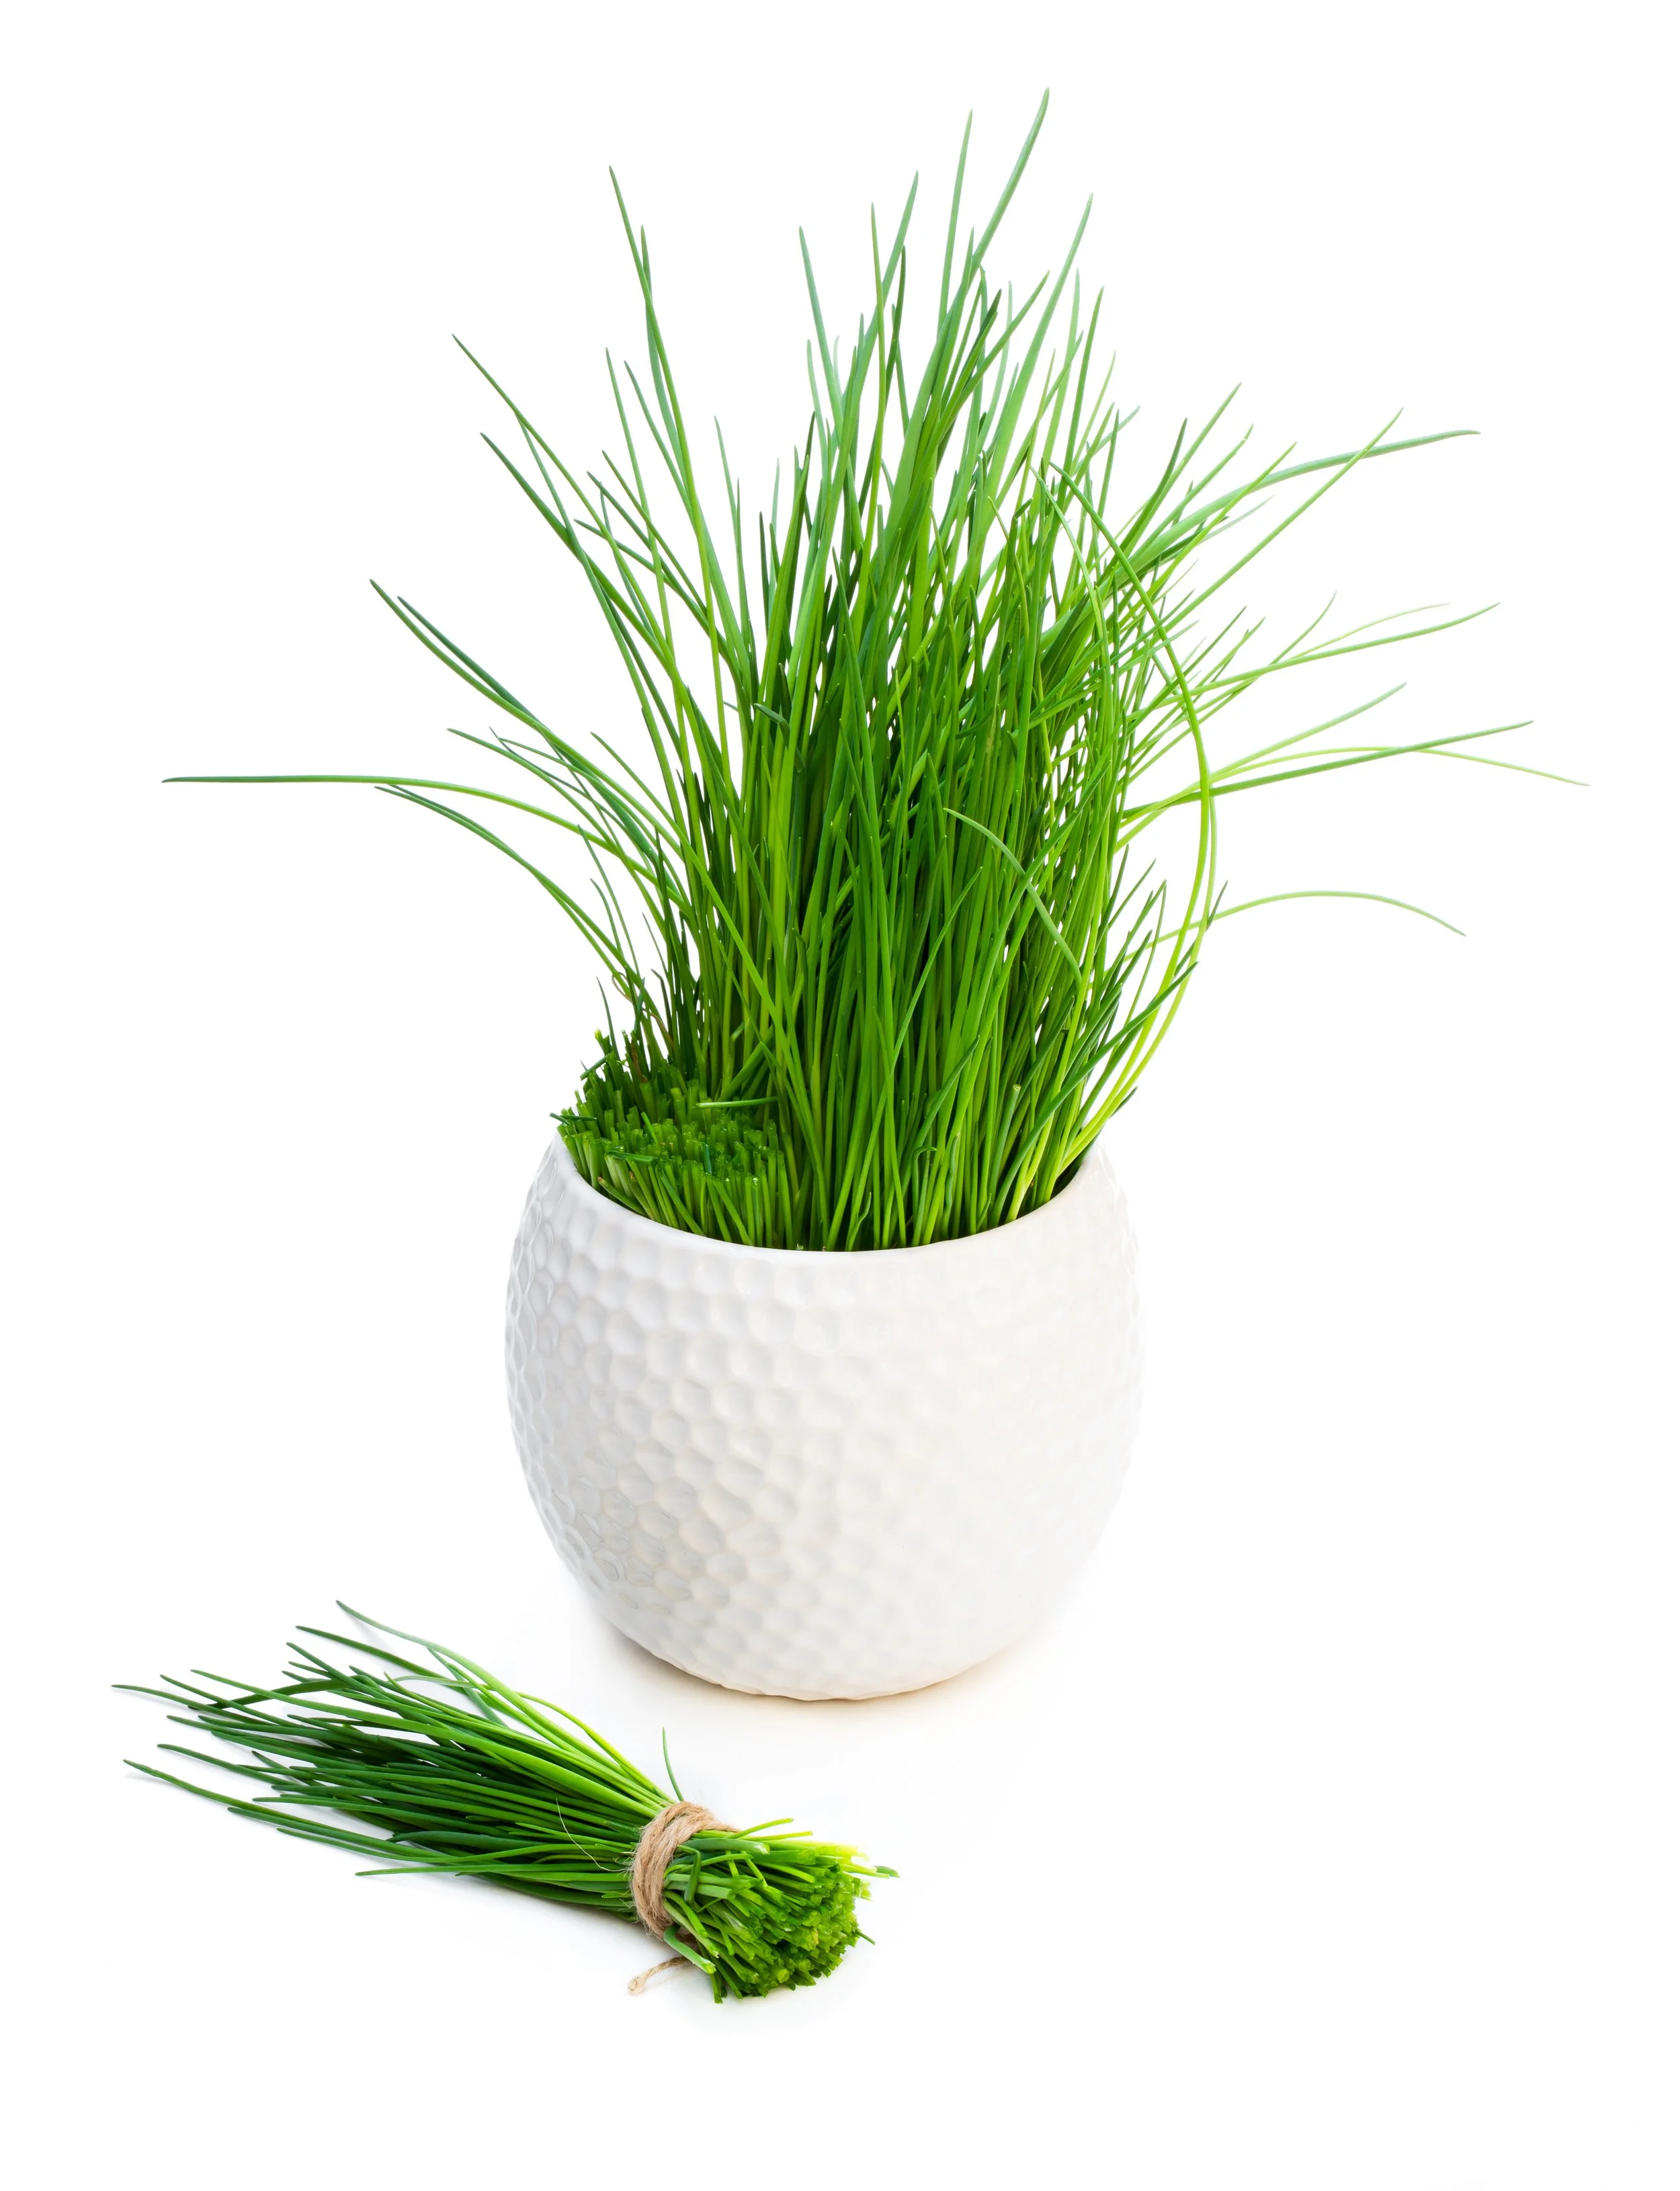
If you don't have raised beds, chives do really well in containers. Your container only needs to be 6 inches deep, but it must have a drainage hole at the bottom so that chives don't sit in water—no herbs enjoy that. You can grow potted chives on a porch, on a balcony, even indoors in a sunny windowsill or under grow lights.
Chives will grow in partial shade, though they prefer full sun. If you experience really hot summers, see if you can give your chives some afternoon shade.
How to Source Chives Plants
Chives are fairly easy to grow from seed. You can either start chives seeds indoors about 6 to 8 weeks before your last frost in the spring or sow seeds directly in the garden once your soil is workable.
If you don't want to deal with starting your own seeds, you can always plant chives by rooted clumps or starter plants in the spring. Buying little chives plants from your local nursery is a worthwhile investment. Not only will you be able to harvest sooner, your plants should come back year after year.
If you live in a warmer climate, you could plant chives in the fall, as well. Just make sure they have a good 6 to 8 weeks to get established before your first anticipated frost.
3 Tips to Keep Chives Growing
Avoid planting this herb outdoors during the heat of summer. The best time to plant chives is in the spring or fall. Once chives plants are established in the garden, they barely require any care at all.
Follow these tips to keep your chives around for the long haul.
Give Chives 6+ Hours of Sun
Make sure your chives are getting full sun if you want them to flower. Chives will continue to grow with just 4 to 6 hours of sunlight a day; they'll just grow slower and probably won't spend energy on flowering.
Start with Good Soil
Grow your chives in well-draining soil. If you're growing them in a pot or container, I like to mix potting soil with some coarse sand and compost. (You could use vermiculite instead of sand if that's what you have on hand.) The sand helps with drainage, and the compost adds a little nutritional boost.
If you set your chives up with nutrient-rich soil from the beginning, they won't really need to be fertilized. Just add some fresh compost or a pinch of worm castings every quarter or so, and they'll be good.
Water Consistently
Water chives when the top two inches of soil feel dry. They'll tolerate some drought, but it's best to be consistent with your watering. Potted chives will dry out much faster than chives growing in a larger container or raised bed.

Why Are Chives Good Companion Plants?
Ask not what other plants can do for chives—ask what chives can do for your garden. I think that's how it goes, right?
Chives are a fantastic companion plant for just about whatever you want to grow in your kitchen garden or herb garden. Not only do they protect your carrots, kale, lettuce, tomatoes, etc., from pests, they also attract lots of pollinators right when your warm season plants need to be pollinated.
Chives also grow really well alongside perennial herbs from the mint family—think rosemary, sage, thyme, oregano, and lavender - because they have similar growing preferences.
Chives are ready to be harvested about 60 days after planting from seed if you started new chives plants. If you buy a mature plant from the store, you can begin harvesting a few leaves at a time immediately. Just give transplants several weeks to adjust before harvesting heavily from them.
Once your plants are established, treat them like any other cut-and-come-again herb. In other words, harvest the leaves, give the plant time to regrow, and then return to harvest more leaves. Cut from each plant at least monthly to keep it healthy and encourage it to be productive.
Use a clean pair of scissors or snips to cut the plants just 1 to 2 inches above the soil. I like to grab several stems at once like I'm gathering hair for a ponytail. New growth will spring from the center of the plant, not the tips; again, that's why a good cutting back can keep your plant healthy through the growing season.
How to Harvest Chives
How to Harvest Chive Blossoms
Onion chives typically blossom in the spring, while garlic chives flower a bit later in the summer. You can leave some flowers for the pollinators, but again, remove them before they dry and scatter their seeds if you don't like volunteer plants.
Chive blossoms grow on much sturdier stems than the rest of the plant, and they're at their peak of flavor right after they've opened. To harvest, cut the stems all the way down at their base, just like you would a cut flower. Speaking of cut flowers, if you're not interested in eating your chive blossoms (remember, they're 100 percent edible), you can enjoy them indoors in a water-filled vase.
Chives are at their most flavorful when they're freshly harvested, so take only as much as you need at a time.
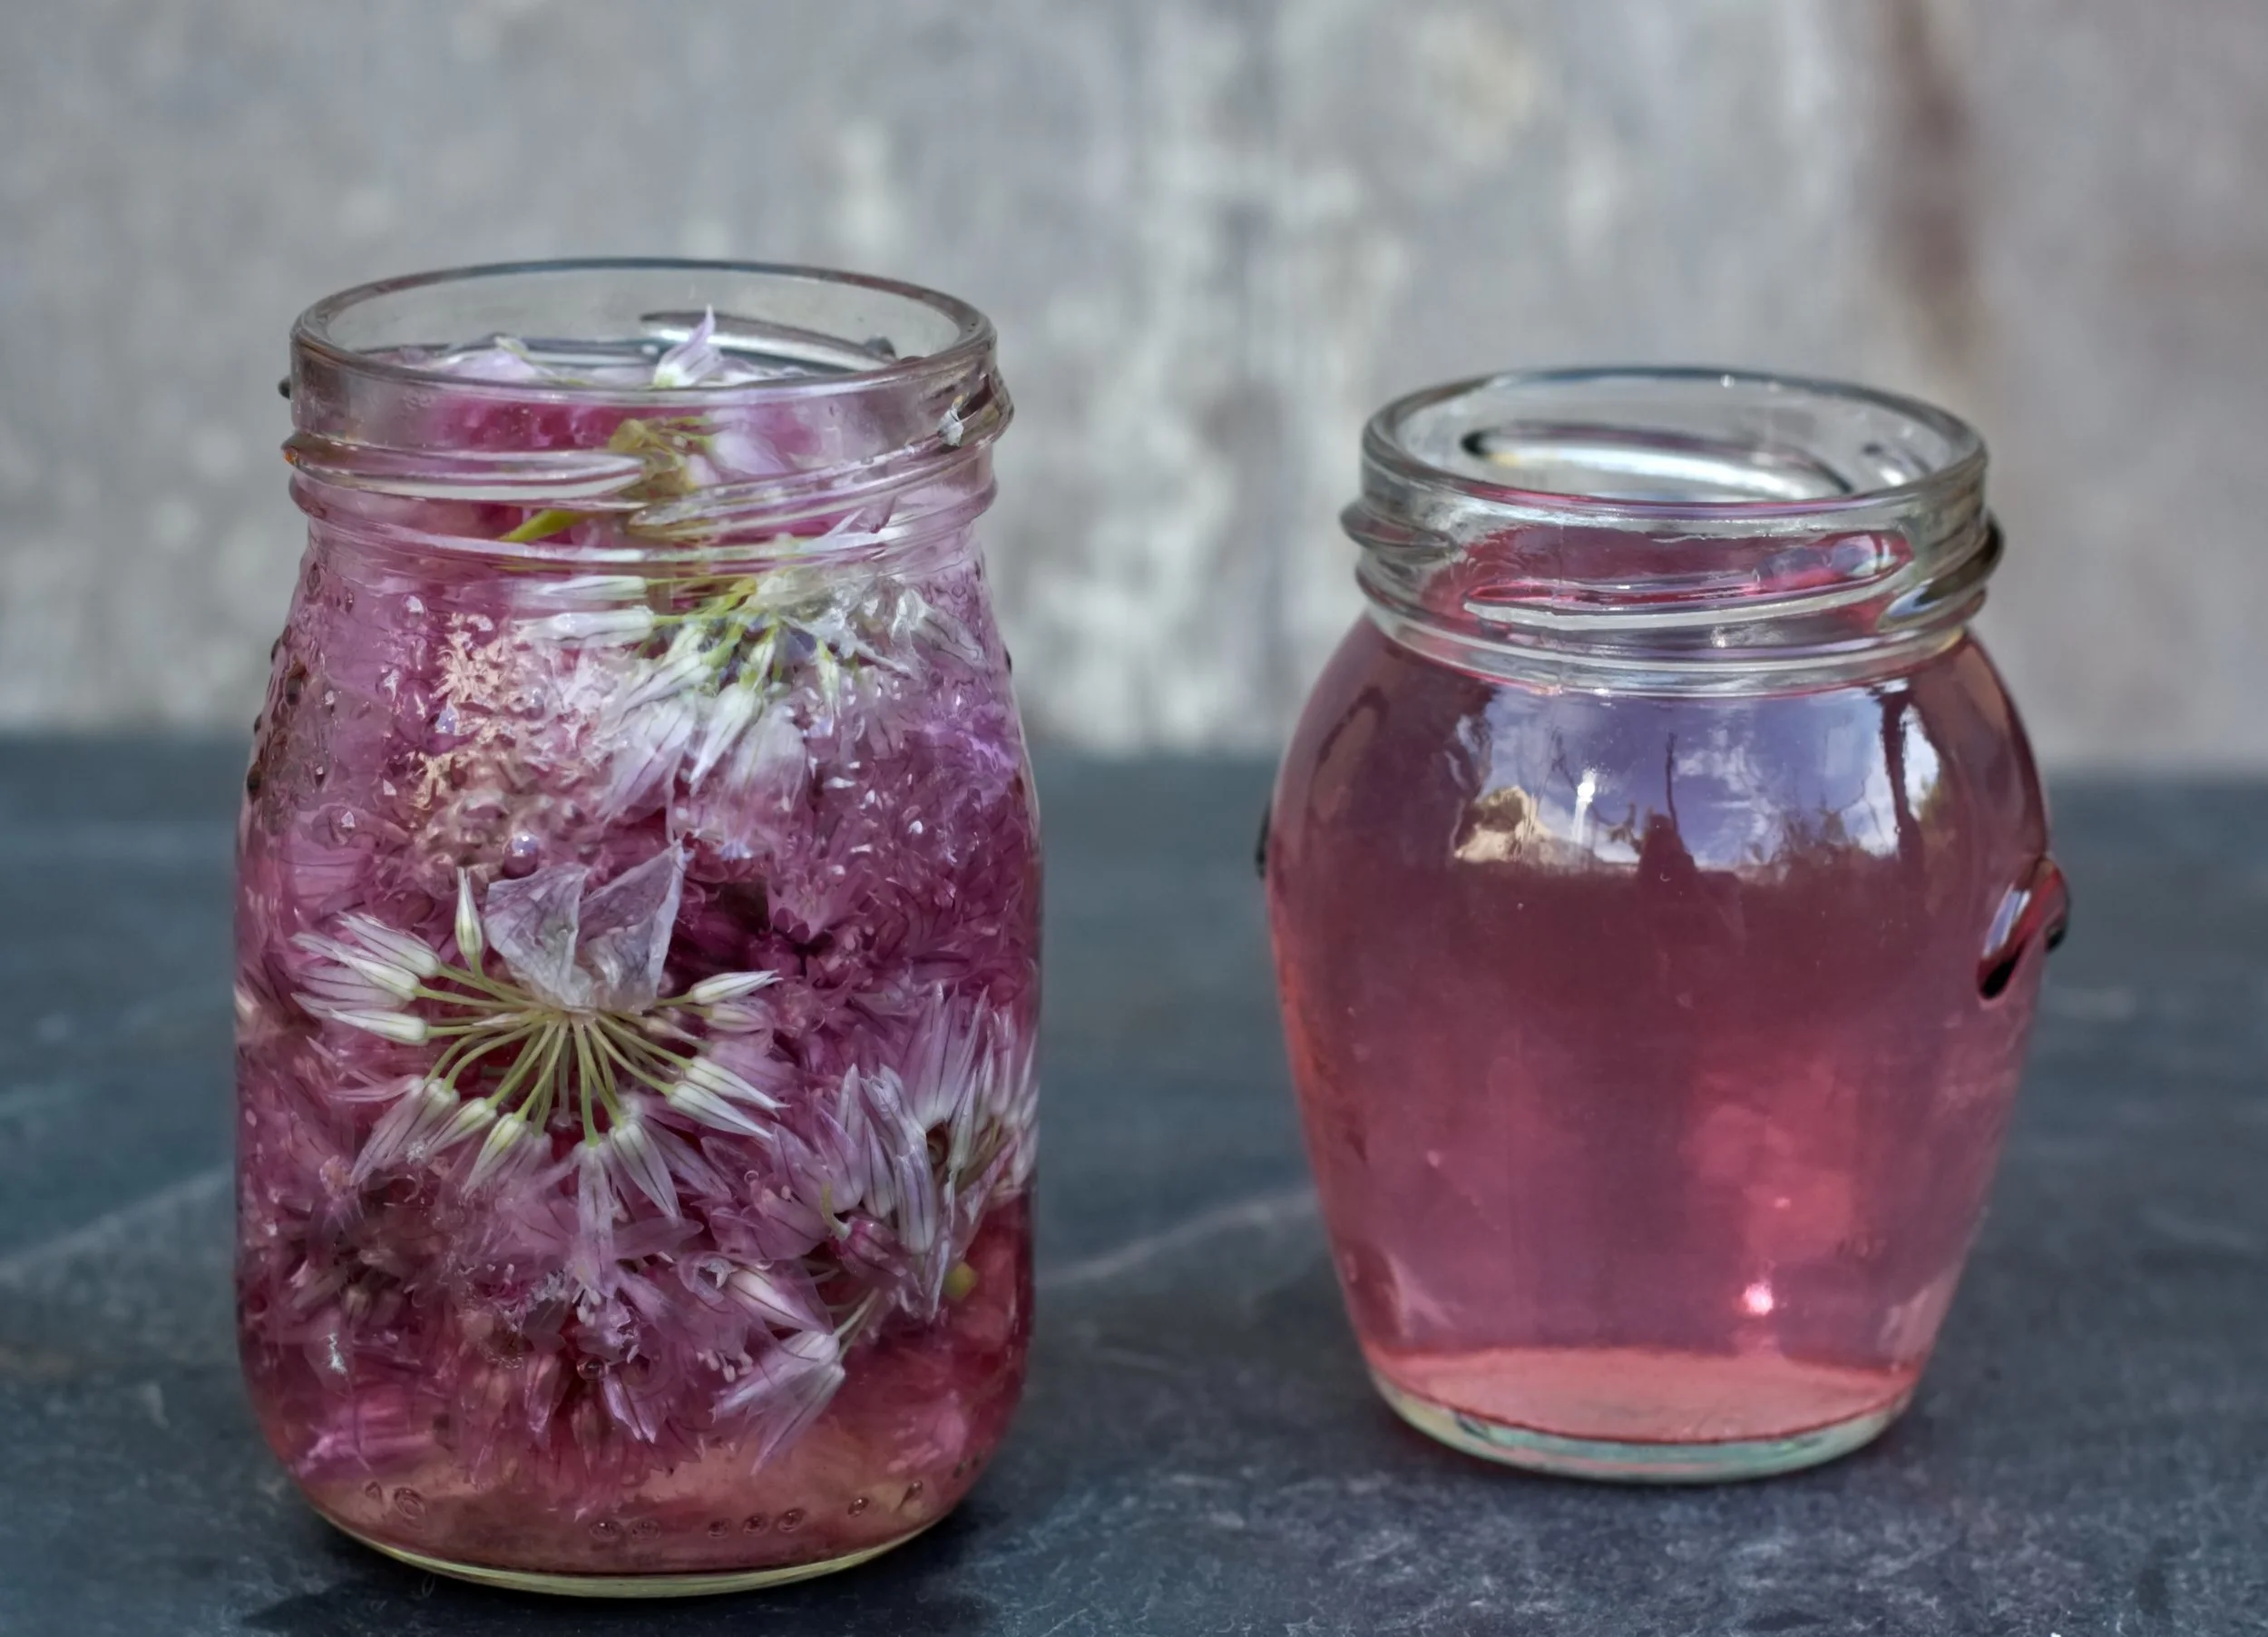
Make chive-infused vinegar! Seasoned vinegar with chive flower heads can be used to flavor salads and meals. Soak clean chive blossoms (flowers) and/or chopped chive leaves in vinegar for one to two weeks, then strain the solids. The resulting vinegar will have a delicate onion flavor and a beautiful pink or purple hue if using the blossoms.
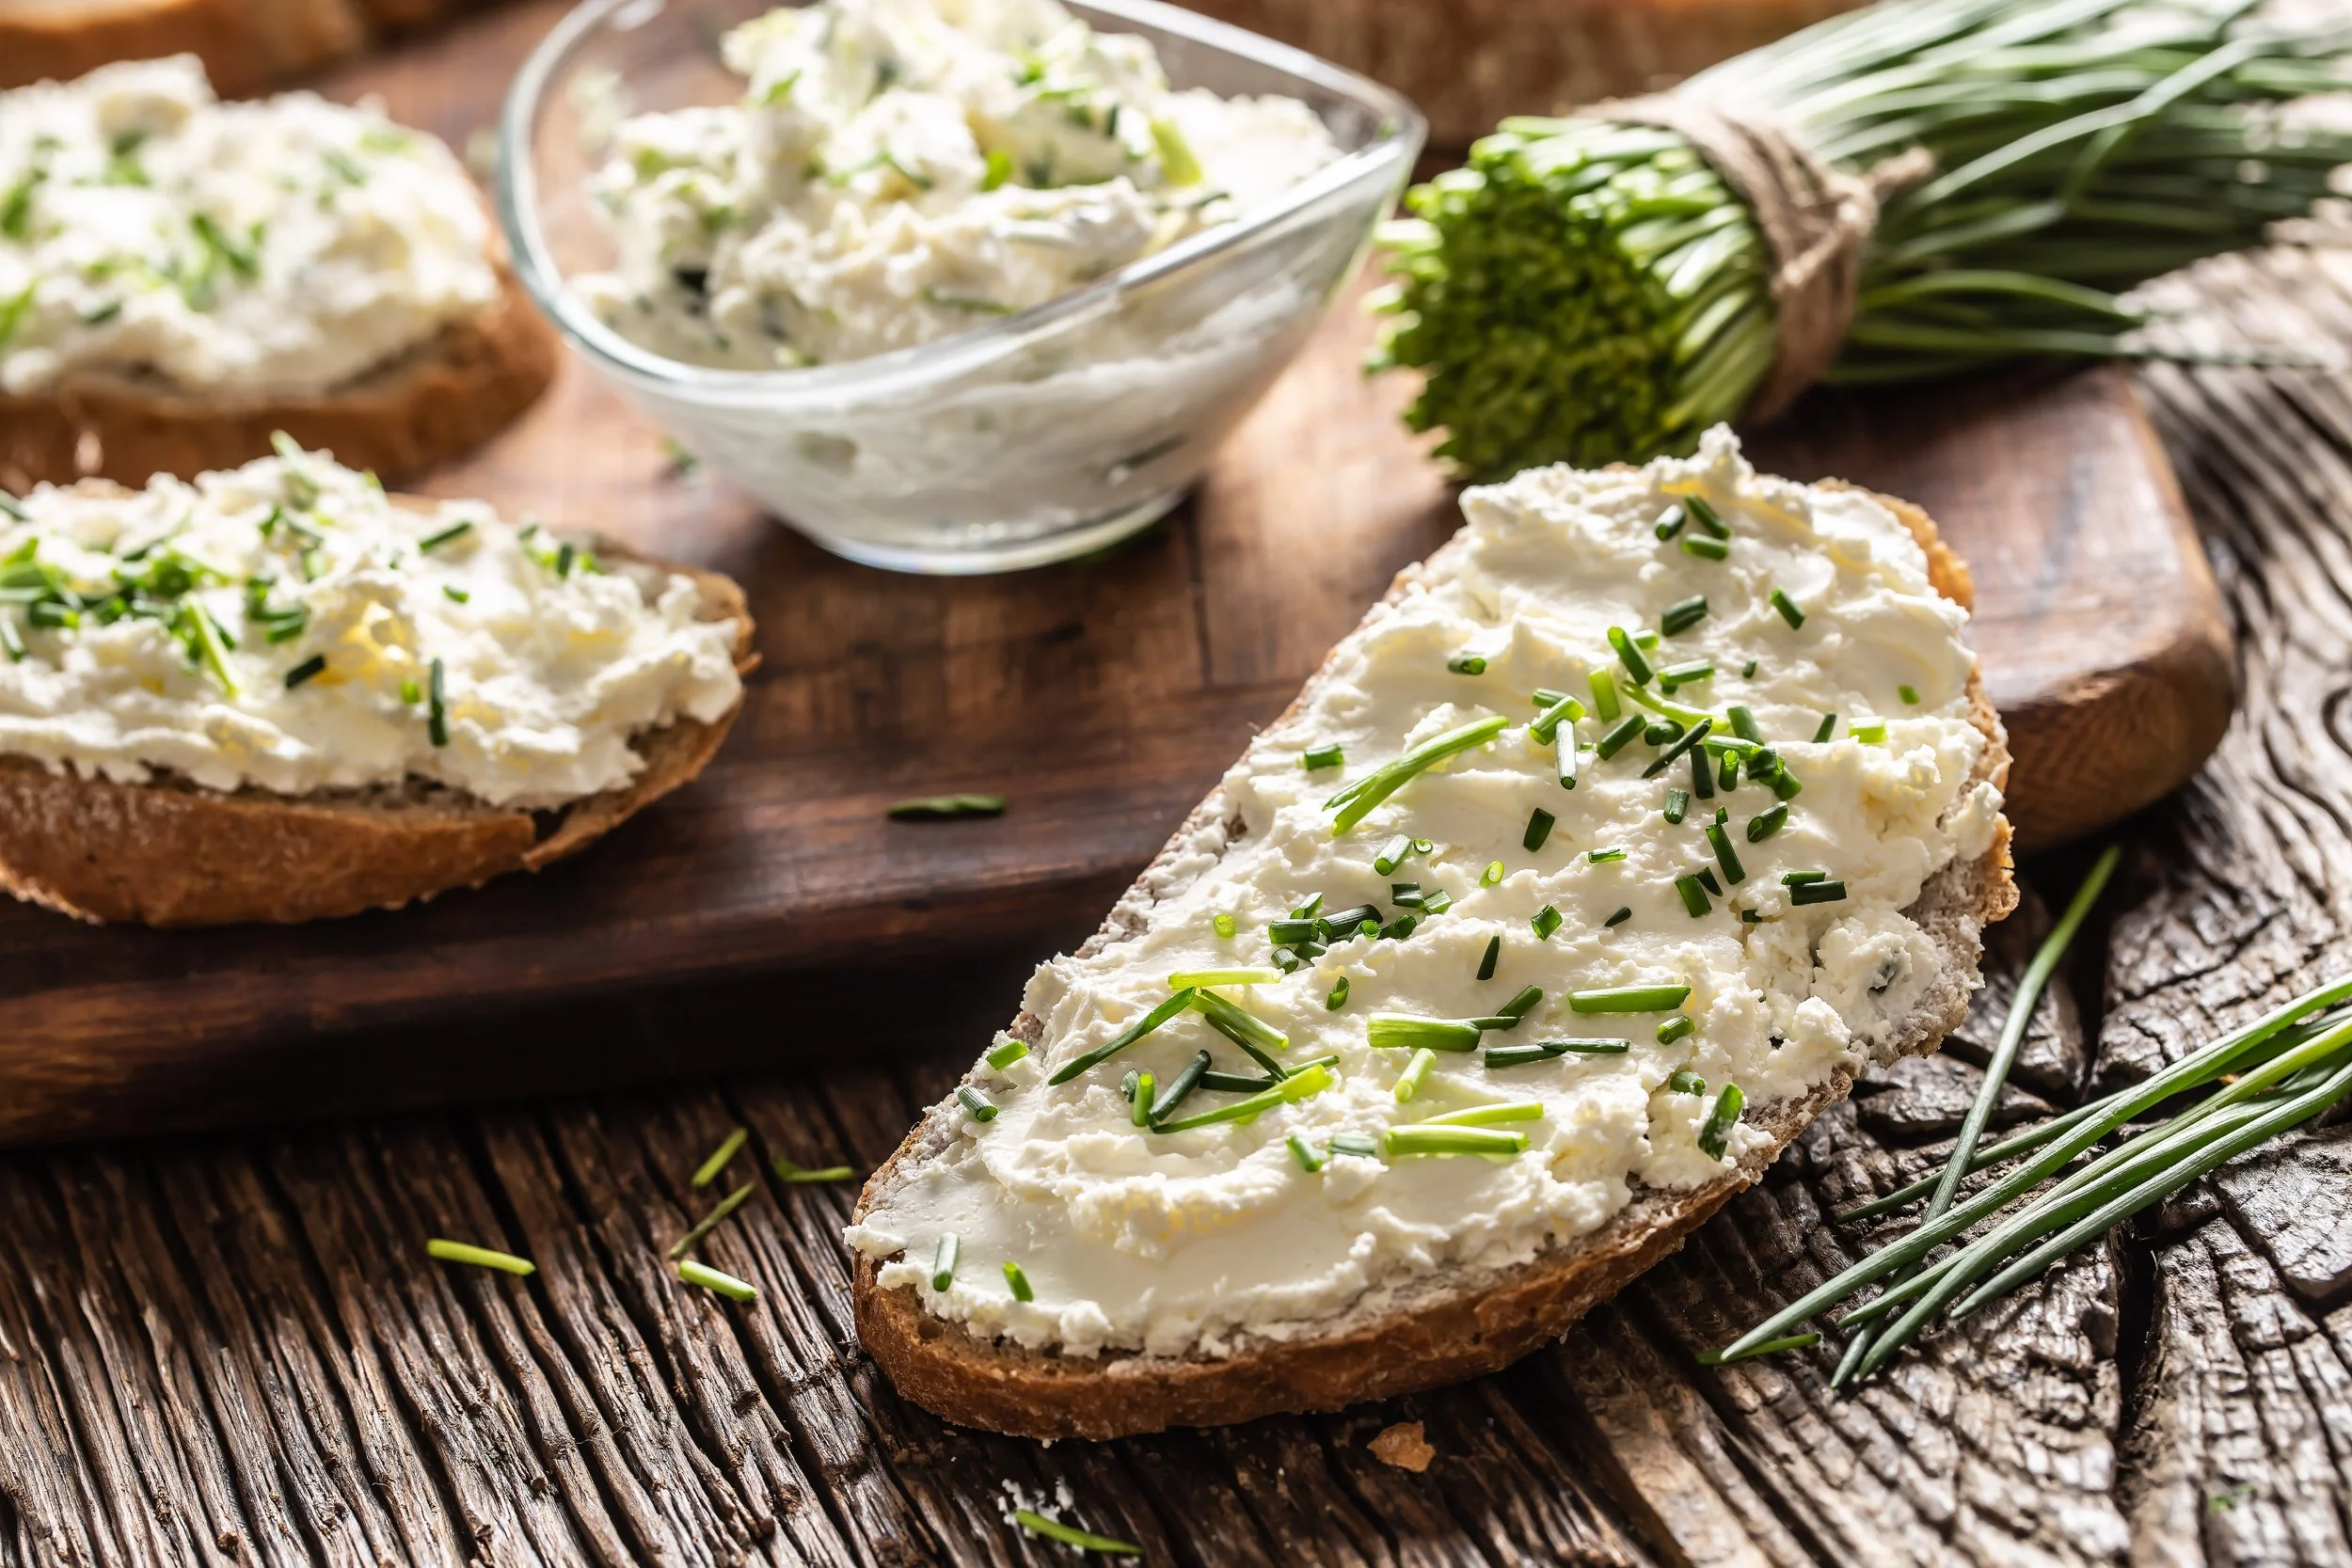
Toss chopped stems into salads or onto soups, stews, omelettes, casseroles, baked potatoes - really anything savory that needs just a tad more flavor. If you've harvested a lot of stems, you could make your own chive butter to melt over your favorite protein or smear over bread.
If you have extra stems, wrap them in a damp paper towel and put them into a container or jar in the fridge. You can also store chives in the freezer if you won't be able to use them in the next couple weeks. I don't recommend drying chives because they lose their flavor.
Chive blossoms are where you can get really creative since they're not something you're likely to have tasted unless you've grown and harvested your own. You can enjoy the entire blossom whole or you can break it apart and use the pieces as a garnish (the flower stems are probably a little too rigid for your liking).